
Remote work has become an integral part of our life now a days. Microsoft knew this and they have made substantial investments in Microsoft teams to make your life easier.
- Free for personal use
- Noise suppression
- Mute Attendees
- Transfer meeting across devices
- Conduct Polls within Teams
- Add / Switch between multiple accounts
- Pinned Posts
- Control your notifications
- Better control over status (with Durations)
- Create teams using templates
1. Free for personal use
Microsoft teams for personal use is free. If you love using it at work or at school, you can now use it at home as well. Previously you could use only the mobile app and the web app for consumer use. Now that if you have an outlook.com email account, you can use Microsoft teams. You get all the power of Microsoft teams windows app including features like Together Mode, Screen Sharing etc. without any time limit. Also, your Teams calendar will be synced with your outlook calendar. So, the best thing is like you can think of it like a very much improved version of skype and it’s entirely free to use.
2. Noise suppression
What is noise suppression?
Imagine that you have a dog barking in the background or a baby crying or maybe you’re eating some chips. This makes a lot of disrupting sound for all your other attendees in the meeting. With noise suppression, you can very easily eliminate all those background noises easily.
So how do we turn on noise suppression?
In Microsoft teams, click on your profile picture in the top right corner > Click “Settings”.
Click on Devices menu. Within device settings there is now a new option here for noise suppression and by default it’s set to “Auto”.
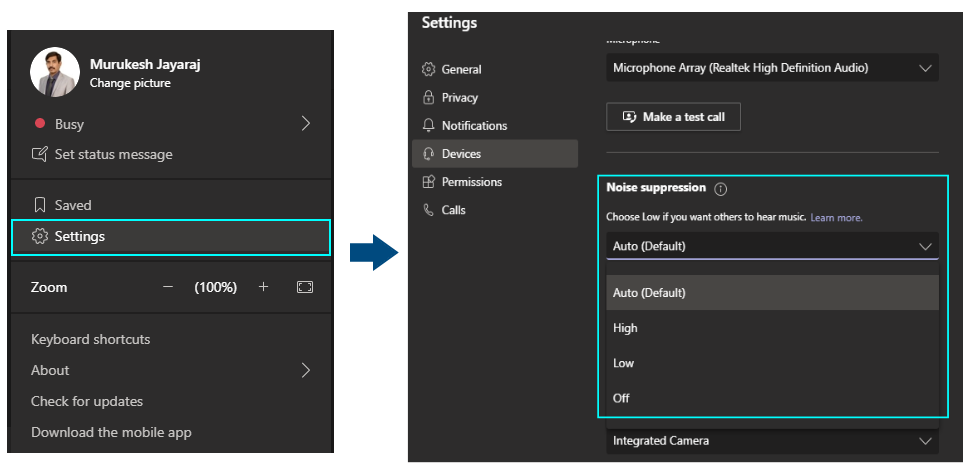
So, what this means is that teams will determine the best level of noise suppression. There’s also the option of High, Low and Off. With High chosen, this will suppress all background sound that isn’t speech. This will also require the highest level of system resources. If your computer is already struggling with Microsoft teams, I don’t recommend this setting.
By choosing “Low” this will suppress low levels of persistent background noise. This means, say you have a computer fan that’s loud or maybe you have an air conditioner. this will eliminate those noises. If you don’t want to use any noise suppression at all, you can put it Off.
3. Mute Attendees
You can now “Mute” attendees and your attendees cannot unmute themselves. So, if you want them to be quiet, you can keep them quiet. Well first off, you must be the meeting organizer.
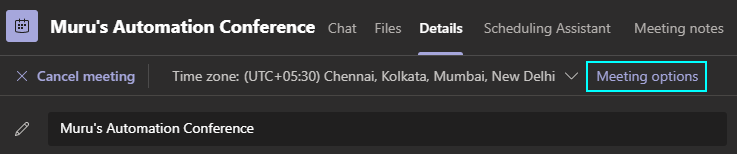
Double click on the meeting to see Meeting details. There’s an option on top called Meeting options – click that.
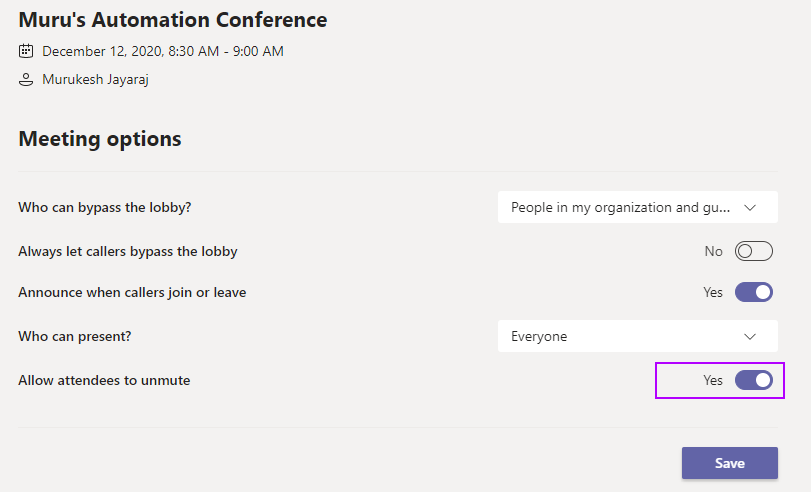
At the bottom of the page there’s a setting to allow attendees to unmute. it’s set to Yes by default, meaning that if you mute someone – they can then unmute themselves. If you toggle it to “No” your attendees will not be able to unmute themselves. Note that if you are a presenter, then this setting does not apply to you. So, you may have to change the role to attendee so that they can’t unmute themselves.
You can also set this setting when the meeting is in progress by clicking the ellipses button the participants pane in the right. Once you set this the attendees will not be able to click unmute.
4. Transfer meeting across devices
You can very easily transfer a meeting between your phone and your PC, without even anyone knowing that you have just switched devices.
Let’s say you joined a “fun meeting” on your phone. When you open teams on your PC, you can see the below notification stating that the fun meeting is going on and joined from another device.
Just click on Join button and you get two different options namely,
1. You could join on both devices. This will let you have both phone and PC active at the same time
2. You could transfer to this device completely.
5. Conduct Polls within Teams
You can now conduct polls during Teams meetings. This way you can get immediate feedback while a meeting is going on. When you’re in the meeting details in Microsoft teams to be able to conduct a poll, click on the plus icon on the top bar à click into Microsoft Forms.
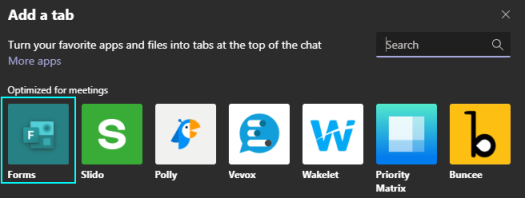
Click on Add then click on Save. You will be back on the meeting screen in Polls tab. Click on Create New Poll.

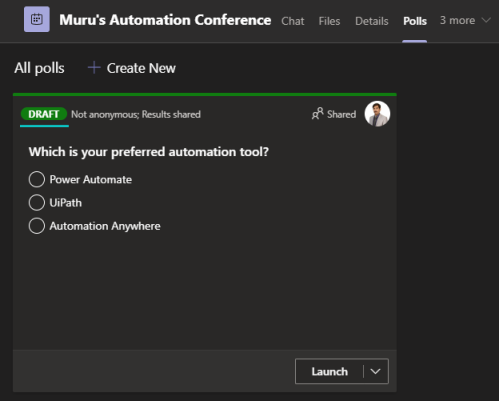
You can then create your very own poll with a question and the different answer options. You can set various settings related to your poll. Finally, click on Save.
You see all the polls that are associated with this meeting. You could launch it right now or you could launch it once you are in the team’s meeting.
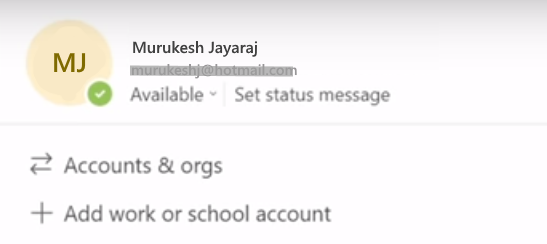
6. Add / Switch between multiple accounts
With the addition of personal accounts in Microsoft teams the desktop app, you can now switch between work accounts and personal accounts. Earlier switching between multiple accounts require to sign out and then sign in back. If you have number of accounts, it was a massive pain jumping between all your accounts. Now it’s nice to see that this experience is a lot simplified.
7. Pinned posts
You can now pin a post in Microsoft teams within this team’s channel.
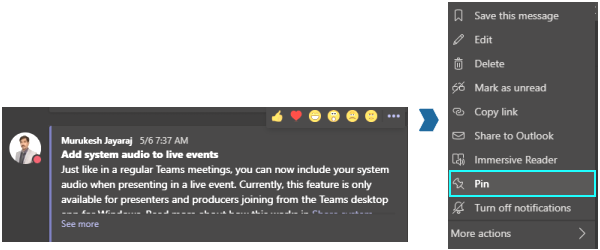
I just posted a message to my team channel and I want to make sure anyone else who joins this team sees this post. To pin the message, you simply Click the ellipses. Within the context menu there’s now a new option called pin. Click on “Pin” and it opens a prompt asking you if you want to pin the message? Click Pin button in the prompt and the message is now pinned and you see a green pin mark next to the message
To view all the pinned messages à Click on the Info icon on the top right corner of the channel. You will see all the pinned posts below the list of members of channel.
8. Control your notifications
You now have a lot more control over your notifications in Microsoft teams. The experience has been cleaned up dramatically now. If you use Microsoft teams and you have a lot of team members and a lot of channels that you are part of, you probably know that notifications can get out of hand. Luckily Microsoft has cleaned up this experience.
Click on Settings > Notifications. You see that you can configure and have full control over what notifications come through in the screen.

9. Better control over status (with Durations)
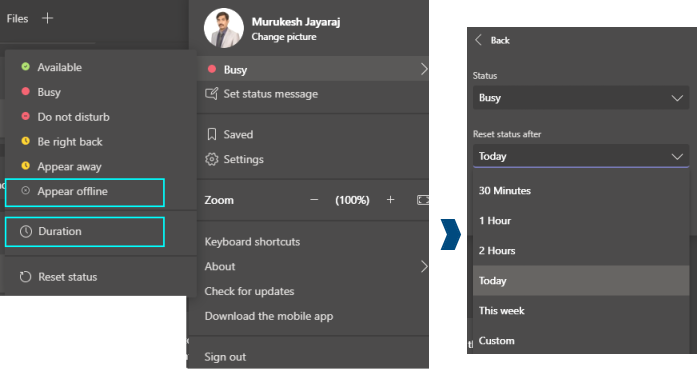
You now have more control over what your status says. Click on our profile picture > Click on Status. You see have all the different standard settings like available “Busy”, “Do not disturb” etc. and there’s a new one now. You can set yourself to “Appear Offline”. No one can see that you are currently online in this case. Maybe you want to take a break and you don’t want people pinging you.
Along with being able to change the status, you can also set the duration of the status. Click on “Duration”, Set the status you want and select the duration in dropdown.
10. Create teams using templates
You can now create Teams using pre-defined templates.
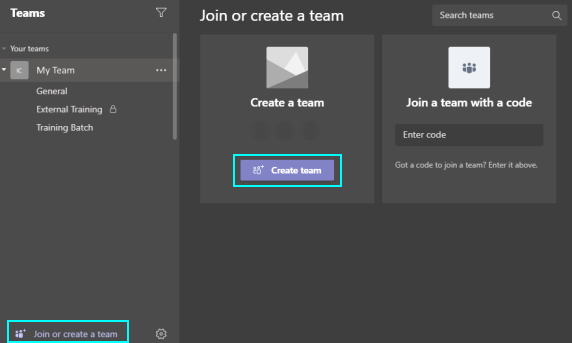
Click on Teams Icon and Click Join or Create a team buttonhighlighted as below.
Click “Create team” button.
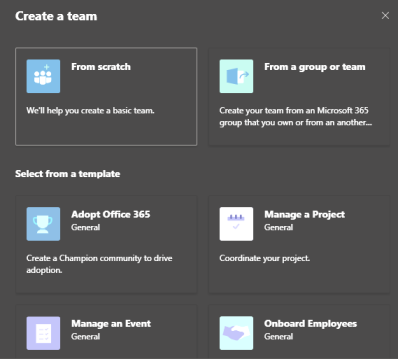
The create team dialog box appears as below with all the templates listed. You can create a team from scratch, or you can choose one of the pre-defined templates from the list.
Alright that’s all I had to write for today. I hope to see you next time soon. Bye!


Hi to every body, it’s my first pay a quick visit of this blog; this weblog includes amazing and genuinely excellent material for visitors.|
Hello There. I discovered your blog the use of msn. That is a really smartly written article. I will be sure to bookmark it and come back to learn extra of your helpful info. Thanks for the post. I’ll certainly return.|
Have you ever thought about writing an ebook or guest authoring on other sites? I have a blog based on the same ideas you discuss and would love to have you share some stories/information. I know my viewers would enjoy your work. If you’re even remotely interested, feel free to shoot me an email.|